 Finished CAD showing the bot with the shell on Finished CAD showing the bot with the shell on
 Now without the shell... Now without the shell...
 The shell will be made of 1/8" Ti with 12 1/8" Ti teeth welded on. The Team Whyachi Bot Shop will be making it once I get enough money... The shell will be made of 1/8" Ti with 12 1/8" Ti teeth welded on. The Team Whyachi Bot Shop will be making it once I get enough money...
 This is a render of the inside of the bot, with the shell and top armor missing. You can see the four Promax Cobalt Speed 400's that will power the weapon. Each will have a 1.5" wheel attached to the output shaft, and the inner 'lip' of the shell will ride on them. The grey stuff above the wheels is oil-impregnated UHMW that will hopefully hold the shell on vertically. This is a render of the inside of the bot, with the shell and top armor missing. You can see the four Promax Cobalt Speed 400's that will power the weapon. Each will have a 1.5" wheel attached to the output shaft, and the inner 'lip' of the shell will ride on them. The grey stuff above the wheels is oil-impregnated UHMW that will hopefully hold the shell on vertically.
 The first shipment of goodies arrive from McMaster; oil-impregnated UHMW (grey stuff), regular 1/4" UHMW (blue stuff), bunches of machine screws, bearings, U-clamps (which I probably won't end up using), and a sheet of 1/16" 7075 Al. The first shipment of goodies arrive from McMaster; oil-impregnated UHMW (grey stuff), regular 1/4" UHMW (blue stuff), bunches of machine screws, bearings, U-clamps (which I probably won't end up using), and a sheet of 1/16" 7075 Al.
 First on my list of things to do was cut the baseplate out. Because it was going to be a pretty weird shape, I wanted to print out the CAD and somehow have it assist me with the jigsawing. Unfortunately, I didn't have any clear window decals, contact paper, etc. handy, so I tried experimenting with this method I came up with. First thing I did was print out the CAD onto regular paper, glue and/or tape it to the metal, and cut it out using a an exacto-knife. First on my list of things to do was cut the baseplate out. Because it was going to be a pretty weird shape, I wanted to print out the CAD and somehow have it assist me with the jigsawing. Unfortunately, I didn't have any clear window decals, contact paper, etc. handy, so I tried experimenting with this method I came up with. First thing I did was print out the CAD onto regular paper, glue and/or tape it to the metal, and cut it out using a an exacto-knife.
 Next I took it out into the garage and spray painted it blue. This meant all the excess material that I should cut off would be blue, making it easy to jigsaw. (All the little white dots are places where the glue I used to hold the paper on refused to let go) Next I took it out into the garage and spray painted it blue. This meant all the excess material that I should cut off would be blue, making it easy to jigsaw. (All the little white dots are places where the glue I used to hold the paper on refused to let go)
 Using 24TPI jig saw blades, I started cutting the baseplate out. The spraypaint was extremely easy to follow, although I'm sure there must be an easier method... Using 24TPI jig saw blades, I started cutting the baseplate out. The spraypaint was extremely easy to follow, although I'm sure there must be an easier method...
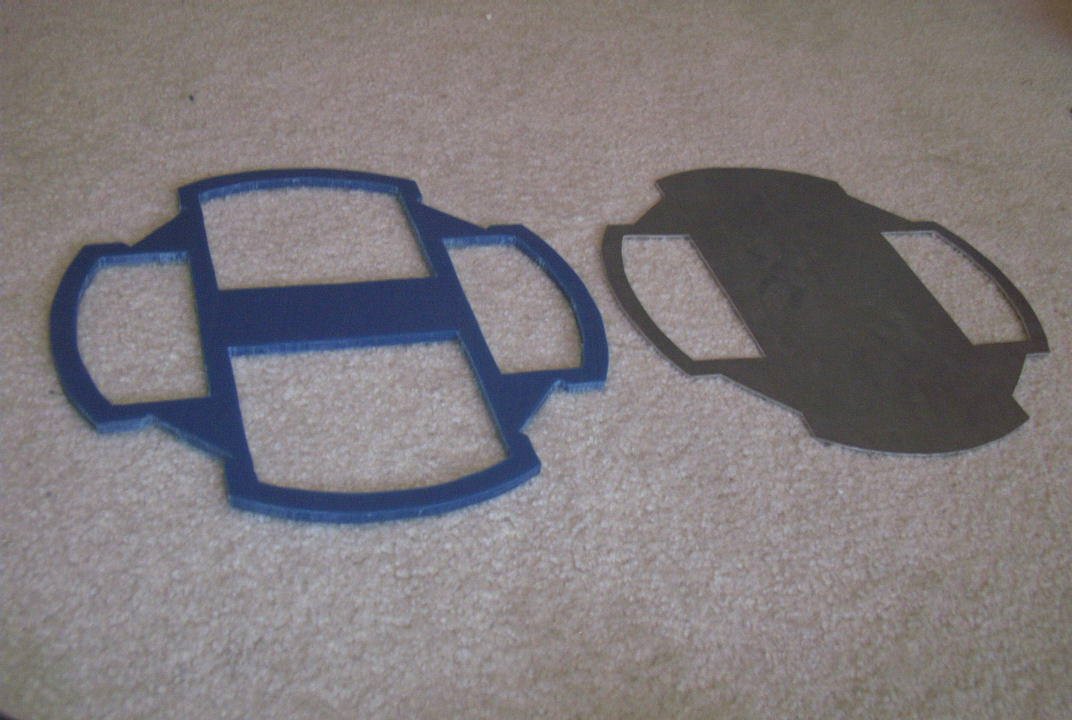
 Et voici. The 7075 baseplate all cut out. It came out surprisingly well. Et voici. The 7075 baseplate all cut out. It came out surprisingly well.
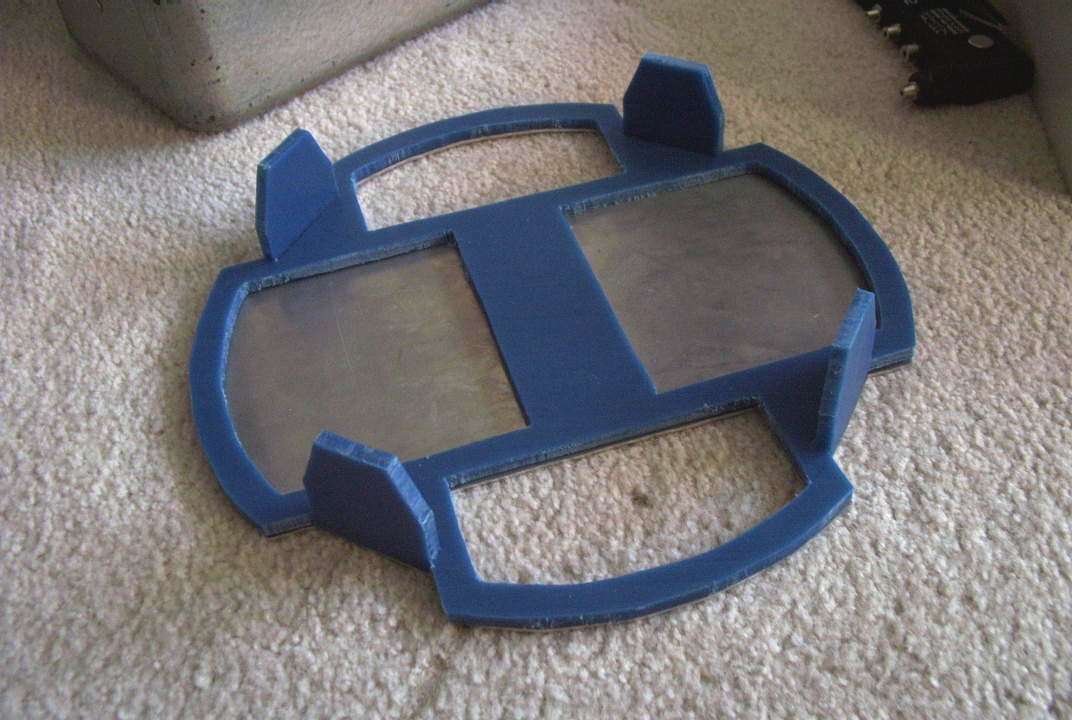
 Next thing to do was cut out the UHMW frame type of thing. I didn't think the spray paint method would work that well on UHMW, so I tried a different method. First, I printed out the CAD 1:1 onto paper and taped it to the UHMW. Next I traced all the lines with an exacto knife, using lots of pressure. When I removed the paper, I got this. (To carve the curves, I placed the 7075 baseplate on top of the UHMW and just traced around it, so that they would match up perfectly.) Next thing to do was cut out the UHMW frame type of thing. I didn't think the spray paint method would work that well on UHMW, so I tried a different method. First, I printed out the CAD 1:1 onto paper and taped it to the UHMW. Next I traced all the lines with an exacto knife, using lots of pressure. When I removed the paper, I got this. (To carve the curves, I placed the 7075 baseplate on top of the UHMW and just traced around it, so that they would match up perfectly.)
 Using 10TPI blades this time, I started cutting out the UHMW. This is how far I got until the second of the two jig saw blades I had bought snapped in two. If you look closely, you can see part of the blade imbedded in the UHMW. Using 10TPI blades this time, I started cutting out the UHMW. This is how far I got until the second of the two jig saw blades I had bought snapped in two. If you look closely, you can see part of the blade imbedded in the UHMW.
 This cool blue UHMW makes pretty scraps when you drill it... =P This cool blue UHMW makes pretty scraps when you drill it... =P
 Eventually I went out and bought two new blades and finished cutting out the UHMW. There were some rough edges, but my file seemed to have gone missing from my tool box, so I took the picture without tidying them up first. Eventually I went out and bought two new blades and finished cutting out the UHMW. There were some rough edges, but my file seemed to have gone missing from my tool box, so I took the picture without tidying them up first.
 I made a scale model of the shell and threw the drive motors in to get an idea of the size it would be when finished... Wow, this bot is going to be small. I made a scale model of the shell and threw the drive motors in to get an idea of the size it would be when finished... Wow, this bot is going to be small.
 I'll save you the tedious marking and jigsawing pics of making the motor mounts, but here's the end result. Four exactly alike motor mounts for the cobalt 400's. All that's left to do is everything... I'll save you the tedious marking and jigsawing pics of making the motor mounts, but here's the end result. Four exactly alike motor mounts for the cobalt 400's. All that's left to do is everything...
|

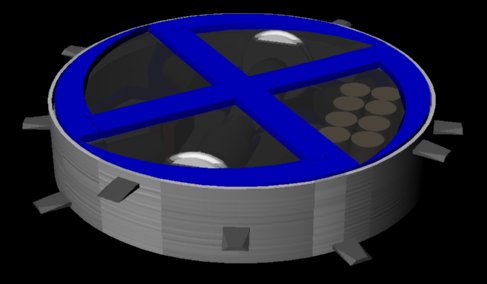 Finished CAD showing the bot with the shell on
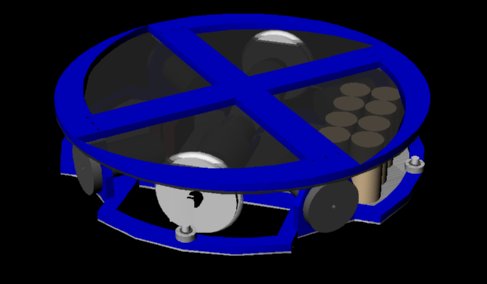 Now without the shell...
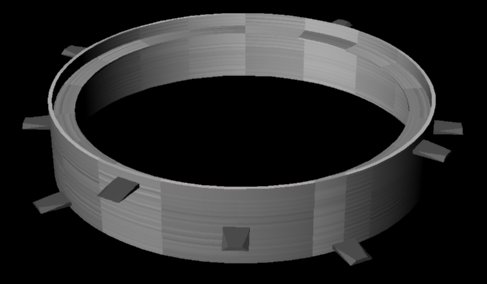 The shell will be made of 1/8" Ti with 12 1/8" Ti teeth welded on. The Team Whyachi Bot Shop will be making it once I get enough money...
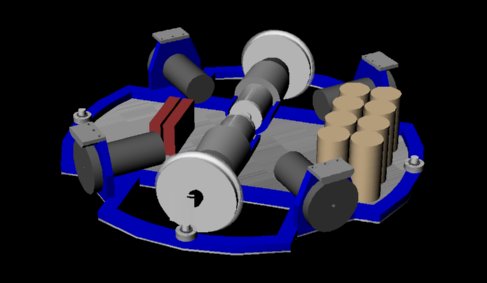 This is a render of the inside of the bot, with the shell and top armor missing. You can see the four Promax Cobalt Speed 400's that will power the weapon. Each will have a 1.5" wheel attached to the output shaft, and the inner 'lip' of the shell will ride on them. The grey stuff above the wheels is oil-impregnated UHMW that will hopefully hold the shell on vertically.
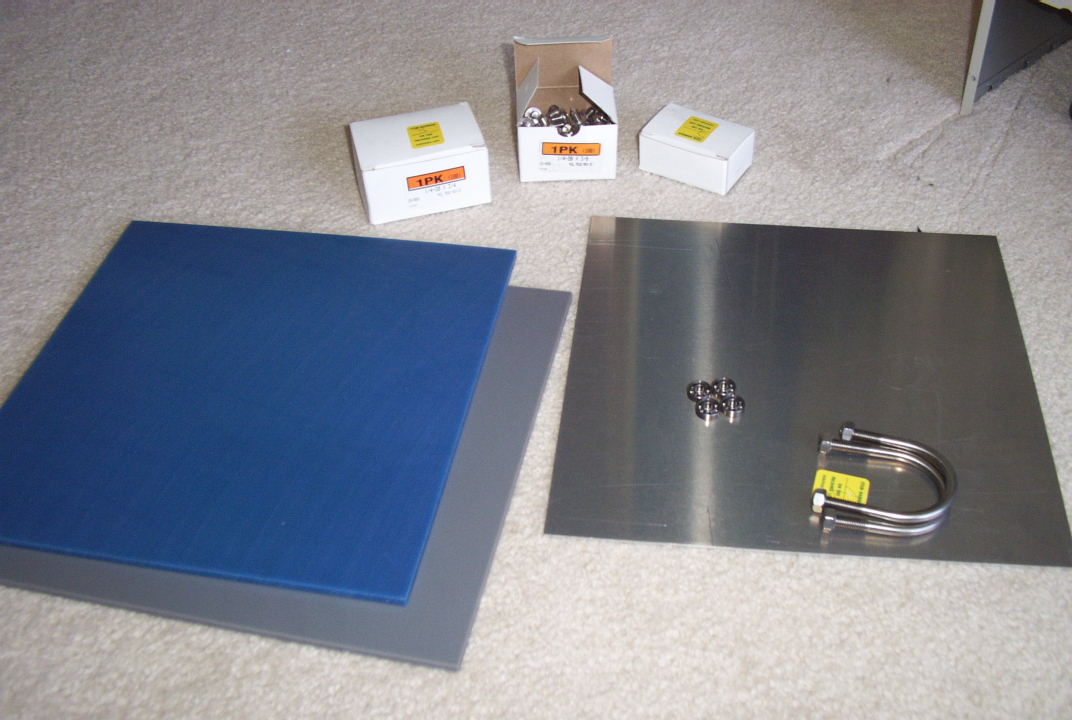 The first shipment of goodies arrive from McMaster; oil-impregnated UHMW (grey stuff), regular 1/4" UHMW (blue stuff), bunches of machine screws, bearings, U-clamps (which I probably won't end up using), and a sheet of 1/16" 7075 Al.
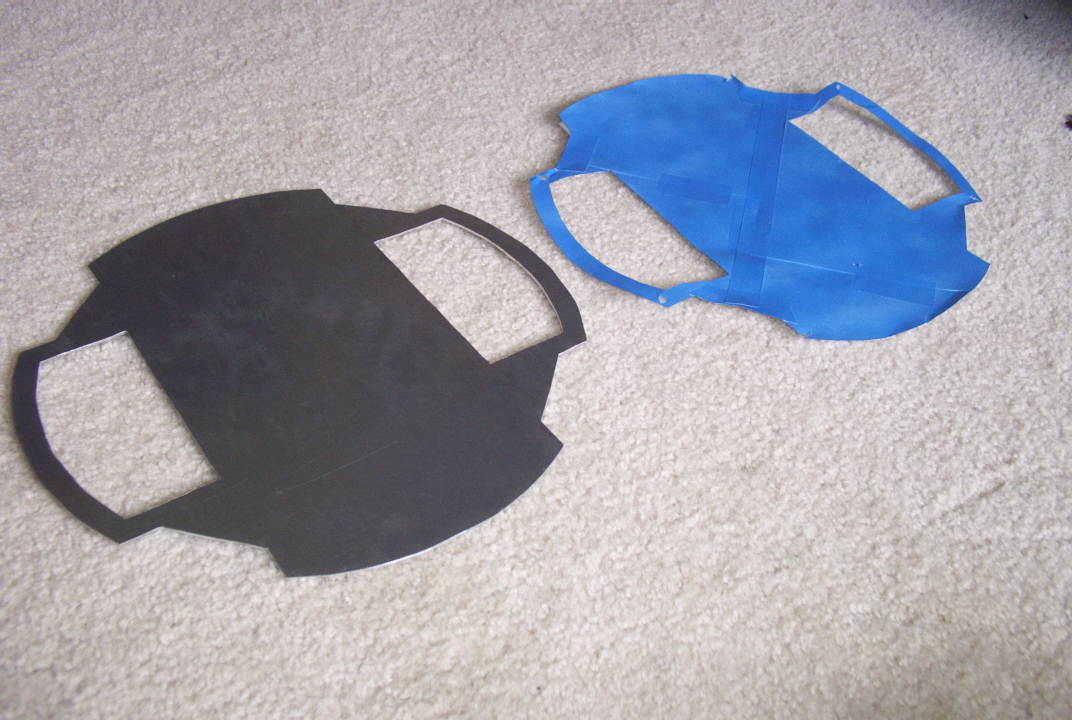
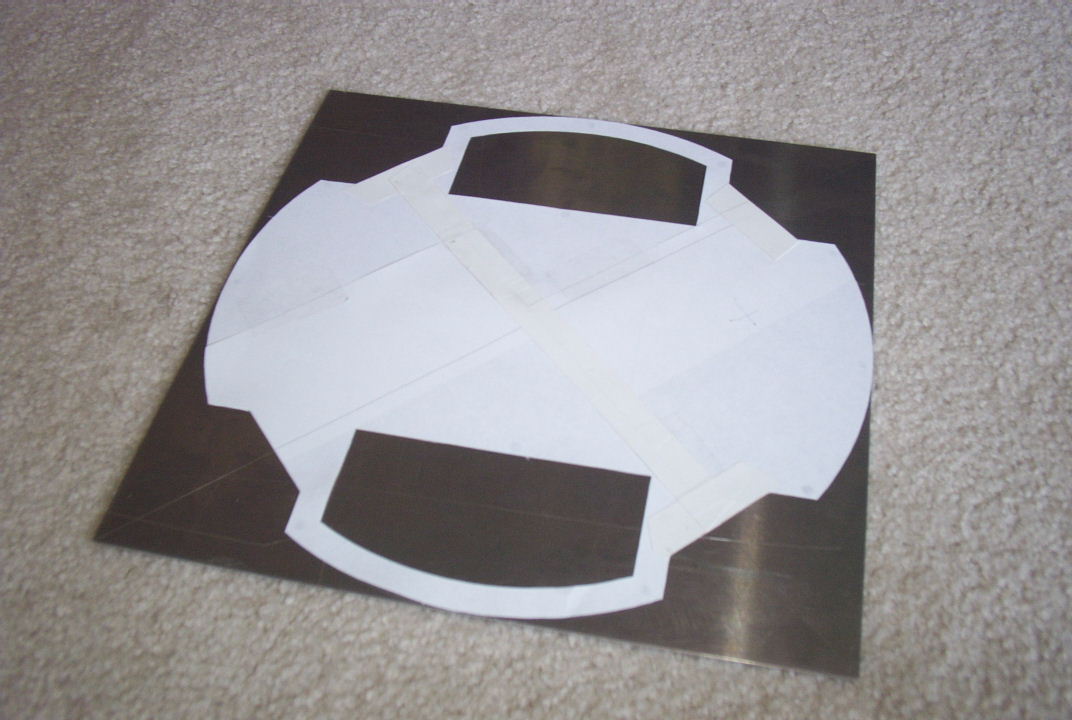 First on my list of things to do was cut the baseplate out. Because it was going to be a pretty weird shape, I wanted to print out the CAD and somehow have it assist me with the jigsawing. Unfortunately, I didn't have any clear window decals, contact paper, etc. handy, so I tried experimenting with this method I came up with. First thing I did was print out the CAD onto regular paper, glue and/or tape it to the metal, and cut it out using a an exacto-knife.
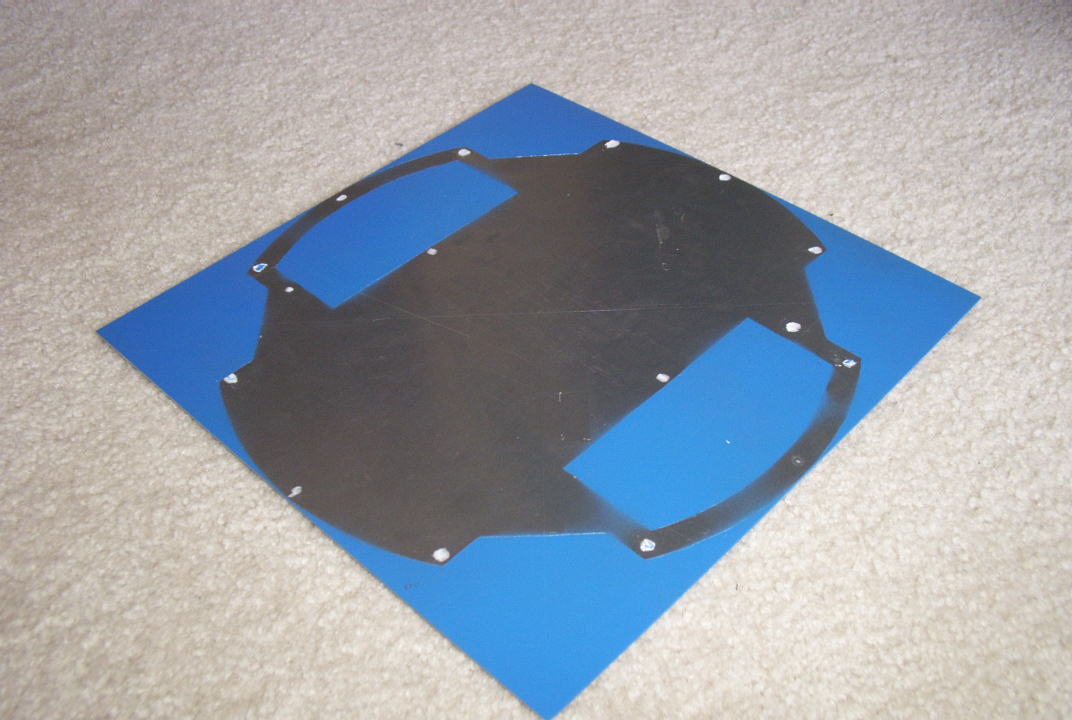 Next I took it out into the garage and spray painted it blue. This meant all the excess material that I should cut off would be blue, making it easy to jigsaw. (All the little white dots are places where the glue I used to hold the paper on refused to let go)
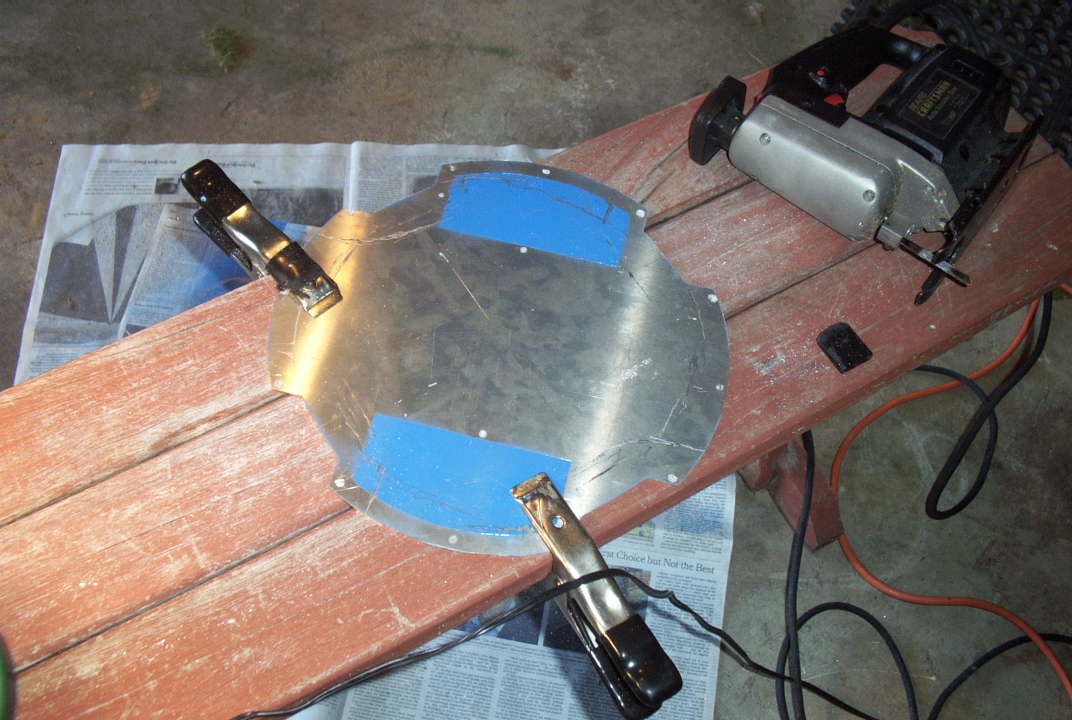 Using 24TPI jig saw blades, I started cutting the baseplate out. The spraypaint was extremely easy to follow, although I'm sure there must be an easier method...
 Et voici. The 7075 baseplate all cut out. It came out surprisingly well.
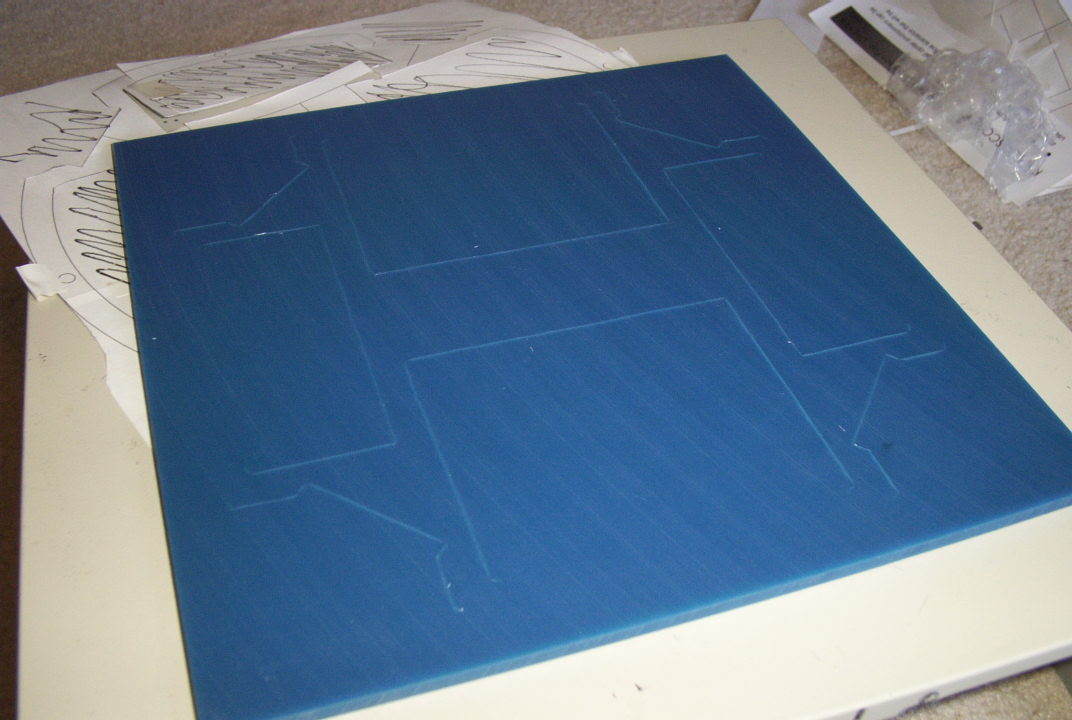 Next thing to do was cut out the UHMW frame type of thing. I didn't think the spray paint method would work that well on UHMW, so I tried a different method. First, I printed out the CAD 1:1 onto paper and taped it to the UHMW. Next I traced all the lines with an exacto knife, using lots of pressure. When I removed the paper, I got this. (To carve the curves, I placed the 7075 baseplate on top of the UHMW and just traced around it, so that they would match up perfectly.)
 Using 10TPI blades this time, I started cutting out the UHMW. This is how far I got until the second of the two jig saw blades I had bought snapped in two. If you look closely, you can see part of the blade imbedded in the UHMW.
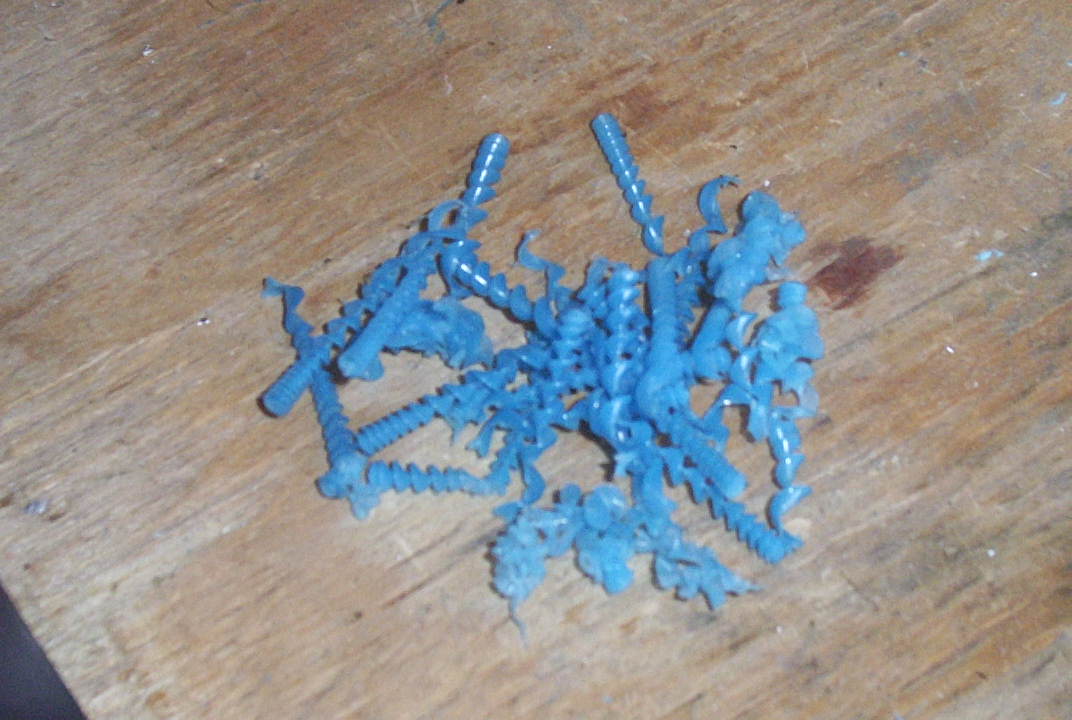 This cool blue UHMW makes pretty scraps when you drill it... =P
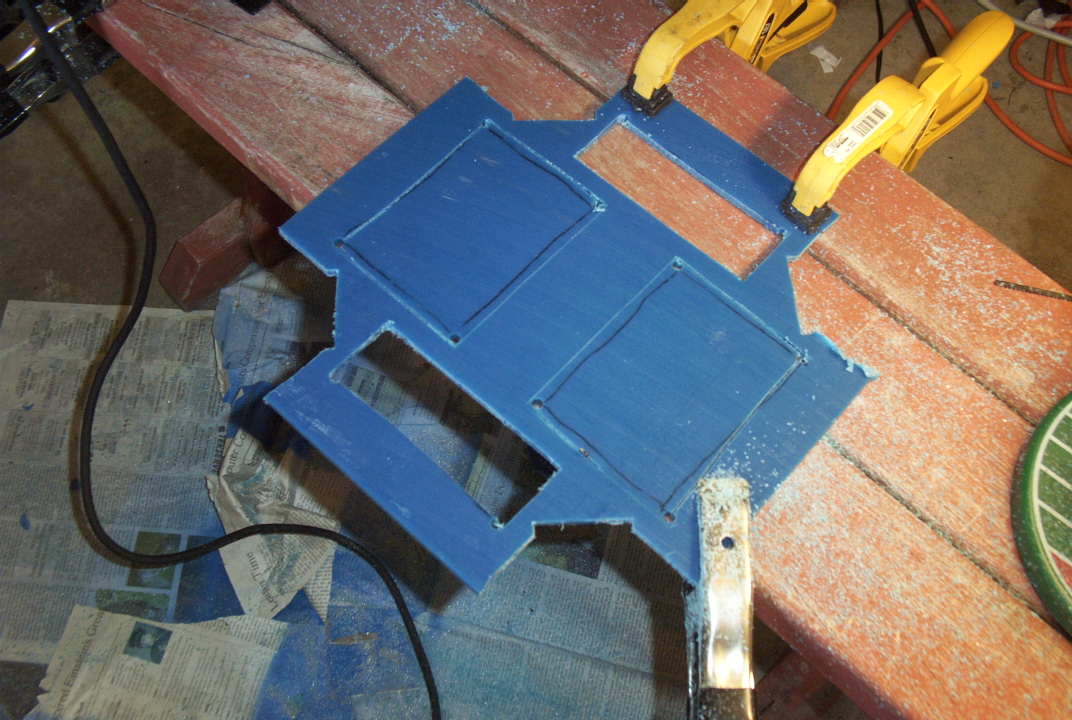
 Eventually I went out and bought two new blades and finished cutting out the UHMW. There were some rough edges, but my file seemed to have gone missing from my tool box, so I took the picture without tidying them up first.
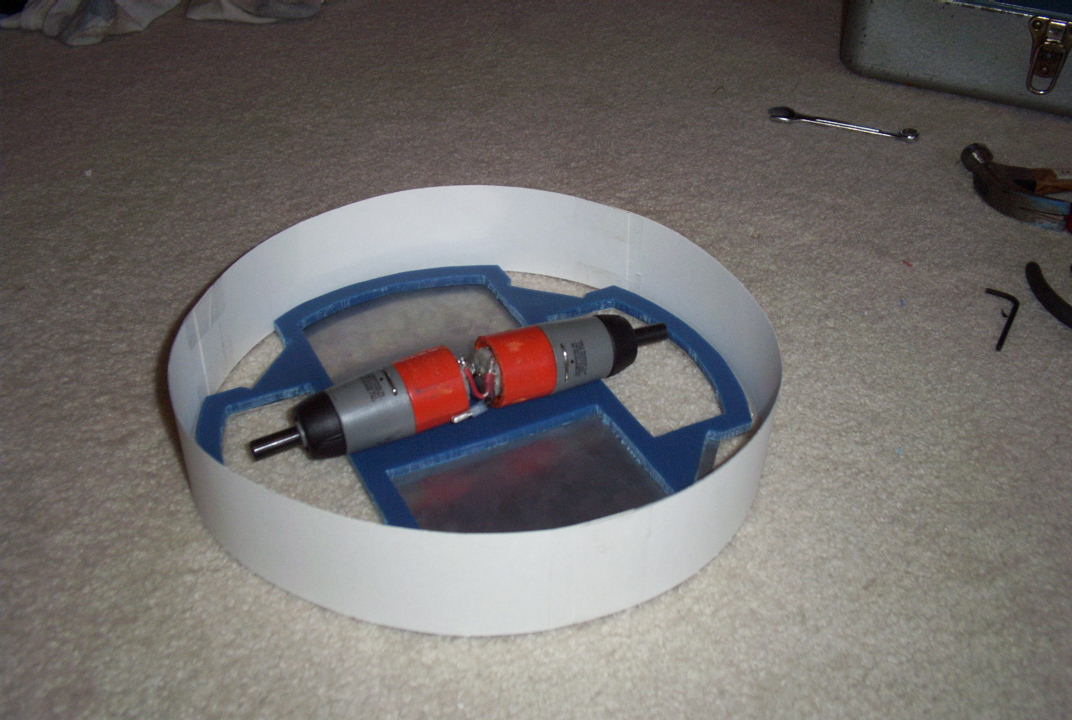 I made a scale model of the shell and threw the drive motors in to get an idea of the size it would be when finished... Wow, this bot is going to be small.
 I'll save you the tedious marking and jigsawing pics of making the motor mounts, but here's the end result. Four exactly alike motor mounts for the cobalt 400's. All that's left to do is everything...
